Ollas (Pronounced ‘Oy-yah’)
An efficient way to irrigate your garden
All you have to do is Google “Olla” (pronounced “Oy-yah” because it is the Spanish word for ‘pot’) and you will find simple instructions on how to make one using two terracotta garden pots. A YouTube video by Gardening Australia - “Irrigate like it’s 2000 BC tells you everything you need to know in just over three minutes. One thing not mentioned is that after assembly one should fill the Olla and make sure that there are no leaks. If the olla leaks after you have buried it in the soil you will not know it immediately but it will be very inefficient. The Olla will empty quickly and only the soil close to the leak will be moistened. A reliable way to block the drain hole in the lower pot is to use either a plastic disc the size of a Toonie from a recyclable container or a bottle top. Either can be glued in place with silicone. The filler hole that is exposed to the air may also attract insects. The hole should be blocked and a smooth, round pebble or a piece of tile or a cork from a wine bottle will provide adequate protection. To check on water level all one needs is a twig that is long enough to reach the bottom of the Olla as a ‘dip stick’. A plastic funnel facilitates refilling the olla as necessary. Never let the olla run dry. Refill when at least one third of the water remains.
Why would one go to that trouble when you can turn on a faucet to use a garden hose or fill a watering can? Because it is a waste of water and most gardeners garden because they care about our environment. When you water with a watering can or hose you wet the soil surface first. How deeply the water penetrates, of course, will depend on how long you water that particular patch of soil. But, it also depends on the type of soil, the amount of organic matter it contains and how dry the soil was when you figured you should water. In order for water to reach the roots it has to percolate downward through ‘dry’ soil and it is not going to percolate further until that portion of the soil is saturated. It is very hard for the gardener to determine how deeply the water has penetrated unless one digs a hole and makes the observation. Few of us have time to be that fussy. The result, however, is that we seldom water sufficiently.
What happens to the water that we have added to the soil? Two things. First, it will be taken up by the roots, which is what you want, provided you added enough water to reach the roots; second, it will be lost from the soil surface by evaporation, which you don’t want because it will of no benefit to the plants and it is a waste of water.
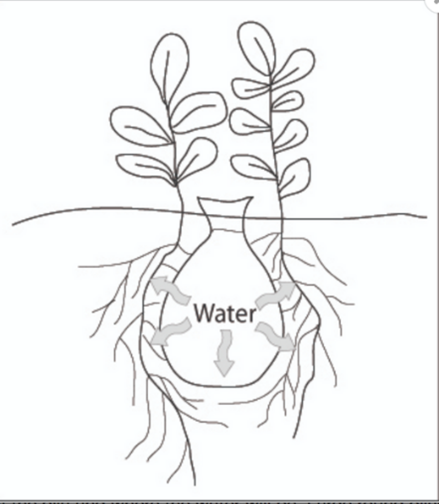
An Olla takes care of both issues. Because of its shape its porous composition and the fact that it is buried in the soil means that it delivers water directly to the rooting zone. The surface soil doesn’t get wet which means that it acts as a mulch and little if any of the water in the wetted soil in the root zone will escape to the atmosphere by evaporation. It is a win-win situation.
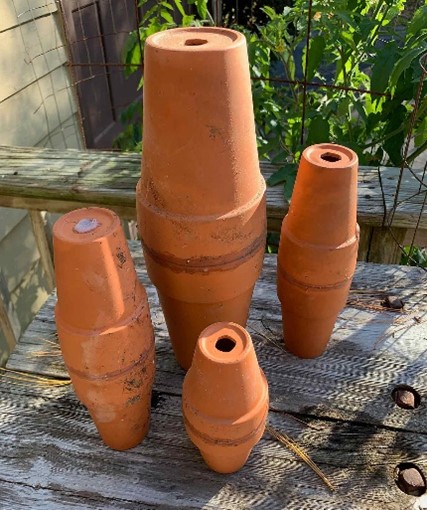
A very important consideration is the size of the Olla because that will influence the area of the rooting zone it will serve. An Olla made from two “8 inch” terracotta garden pots has a volume of almost 7 litres. Experience with such an Olla in a 4x8 ft raised bed, containing a loam soil, showed that it was adequate to irrigate half the bed; namely a soil area 4x4ft. It should be noted that the type of soil may affect efficiency and that trial and error may be necessary before either the size or the number of Ollas is determined for use in any particular garden. The next smaller pot size is 6” and the olla made from two pots has a volume of about 2 litres. This size may well be adequate for large planters.
Experience has shown that by using Ollas the demand for water is reduced by from 50 to 70%.
The rate of transfer of water from the Olla to the soil is a function of the surface area of the olla, not its volume. The volume is the reservoir of water and, of course, the larger the olla the larger the reservoir. The quantity of water that moves into the soil is a function of how much soil is in contact with the outer wall of the olla. It is the surface area of the olla that dictates what volume of soil will be kept moist as water is lost through the olla wall.
An olla made from two 8” terracotta pots has an effective surface area of about 2000 square centimetres. An olla made from two 6” pots has an effective surface area of 800 square centimetres; a two inch (5cm) difference in pot diameter reduces the surface area by more than half. Again, trial and error may be necessary over the course of a growing season to establish the size of olla for a particular planting situation.
Roots grow well when there is adequate soil moisture. They do not “grow towards water”. Water moves through the soil via the pores between the soil particles. Where the particles are small the pores fill easily and stay filled such that water movement is continuous. If the particles are large the pores are also large and do not stay filled so easily unless there is lots of water. Because of their large grains and large pores sandy soils tend to dry out much more quickly. An Olla in a sandy soil will tend to moisten up the soil only close to the Olla. In sandy soils plant your plants close to the Olla.
It is worth doing some homework and relying on your experience as a gardener. Three things to bear in mind is how deep a particular crop roots, the texture of the soil (how much clay, silt, sand, organic matter) and crop spacing. With those factors in mind one can then think about the size of the olla and their separation one from another. Although one can find guidelines on the internet and in other literature one should bear in mind that they are only guidelines and that every garden will have its own characteristics. Price of terracotta pots will vary according to size but price should not dictate the choice of pot. Using the most suitable size will dictate how well the crop grows and that, after all, is the bottom line.
Tips from an Olla-making workshop held at Delki Dozzi Community Garden, April 27, 2024.
Content from Nadine Law, Co-chair & Lead at the garden and Dax Law and Gerard Courtin, Volunteers
What is an Olla?
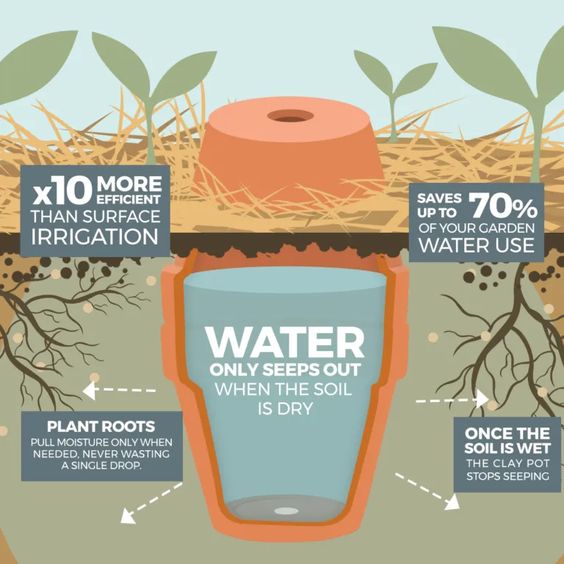
Ollas are an ancient watering method that dates back to 2000 BC. The pots are made from terracotta, which is a porous clay that allows for the plant’s roots to pull moisture only when needed. Once the soil is wet the clay pot stops seeping. They are an efficient way to irrigate your garden. They are 10x more efficient than surface irrigation; and can save up to 70% of garden water use.
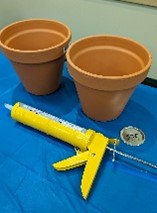
Supplies needed:
- 2 terra cotta pots (an 8” pot is good for 4x4 foot space)
- Caulking gun
- Silicone Sealant (waterproof)
- Paper towel/rag
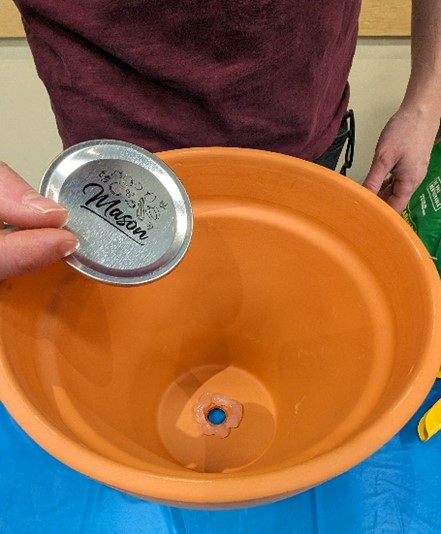
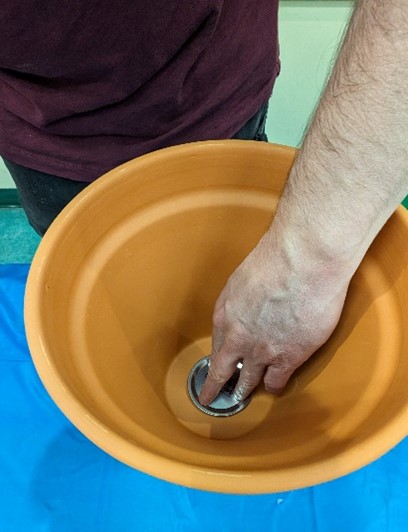
- Metal disc to block drain hole (I use mason jar lid)
- Stone or cork to cover the drain hole on top (needs to be removable)
- Bamboo sticks to measure water usage
Most supplies can be purchased at your local hardware store and "dollar" stores.

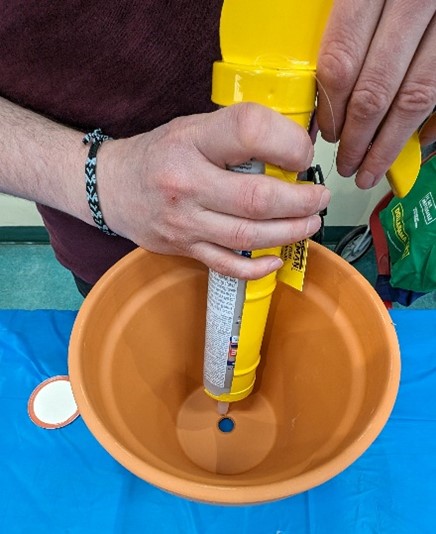
Step 1
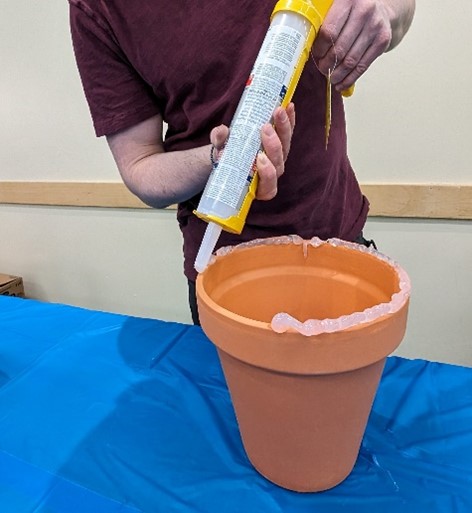
Seal one of the pots' drainage holes. This can be done with a circular disc and silicone sealant.
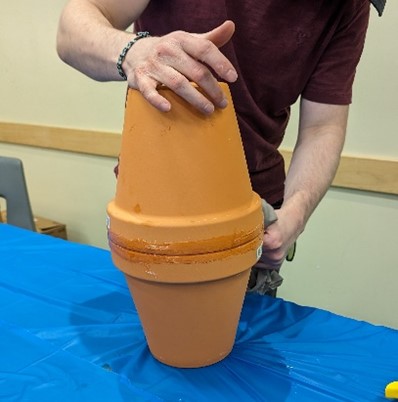
Step 2
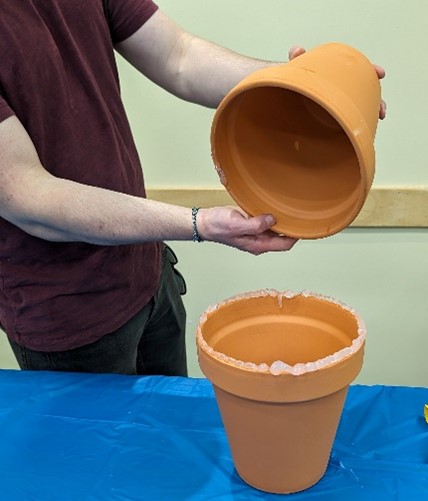
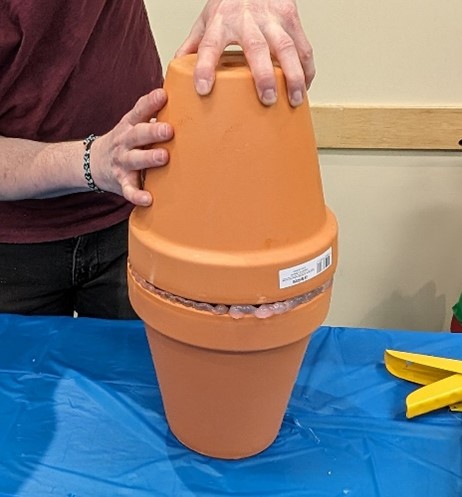
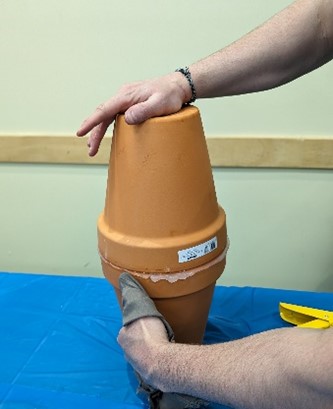
Join the two pots together. Ensure the rims of both pots are completely dry and free of dirt and debris. Apply a continuous bead of silicone around the rim of one of the pots. The bead should be as thick as the rim. Attach the second pot to the first pot, rim to rim, twisting and adjusting the second pot until they are evenly joined. Wrap a paper towel or rag around your index finger and smear the silicone that has bubbled out around the rim to create a solid seal.
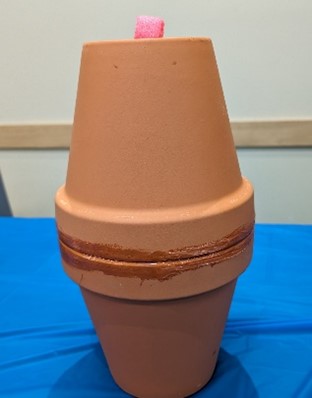
Step 3
Let dry thoroughly. 24 hours are required for full cure and use.
Step 4
Test the seals:
Fill the olla with water through the open hole using a funnel. Let the olla set for an hour or so, and then inspect the joined rims and bottom hole for leaks.
How to use the DIY Olla
Bury the olla, leaving 2-3 inches of the top of it exposed above the ground. Fill the olla with water – the DIY olla made from 8” terracotta pots holds 7 L of water.
Cover the top of the olla with a stone or a cork. This will prevent your water from evaporating, and prevent unwanted materials falling/spilling into the olla.
For the first week or two, measure the water level by using a bamboo stick.
This will give you an idea of how often you will need to refill the olla. Best to fill the olla when it is 2/3 empty.
Are ollas suitable for all plants?
Ollas are suitable for most plants, including vegetables, herbs, and flowers. They are especially useful for extra-thirsty vegetables, such as peppers and tomatoes.
They are not recommend for long rows of crops, such as carrots, potatoes, leeks, onions, or garlic.
Ollas can be used in raised garden beds, container gardens, and in the ground.
Can ollas be left in the ground over winter?
In our region, the answer is NO. Best to dig them up at the end of the season and store them. This will prevent them from cracking.